How to Do Eye Makeup for Hooded Eyes: A Step-by-Step Guide
Learn how to do eye makeup for hooded eyes: where to place shadow, liner shapes that survive the fold, and fixes for smudging and transfer.
The short answer
A hooded eye has a fold of skin that sits over the crease and, depending on your anatomy, over part of the mobile lid too. The practical consequences are always the same: colour vanishes when you open your eyes, liner transfers onto the hood, and a crease shade placed where a tutorial tells you to put it ends up hidden.
The fix is not to fight the fold. Work only in the area you can see with your eyes open, keep your deepest colour low and close to the lashes, place your crease shade higher than your natural crease, and draw liner with your eyes open rather than shut. Everything below is a variation on those four rules.
What you need before you start
None of this is about specific products. It is about having the right types of tool to hand so you are not improvising halfway through one eye.
- A mirror at eye level
- A standing or tilted mirror you can look straight into. Checking from above hides the hood and flatters work that will look uneven head-on.
- Two brushes
- One small, dense brush for placing colour in the crease; one soft, fluffy brush for diffusing edges so nothing looks drawn on.
- An eye primer
- A thin, tacky base stops colour sliding into the fold. Concealer alone usually creases on a hooded lid.
- Three matte tones
- A transition shade close to your skin tone, a mid-tone for the lid and a deeper shade for the lash line and outer corner.
- Translucent setting powder
- Used lightly to take down any tackiness in the primer before shadow goes on.
- Controllable liner
- A fine-tipped pen or a small angled brush with dark shadow. Soft, waxy pencils smudge into the hood within minutes.
- Lash curler and mascara
- Curling lifts lashes clear of the fold, which opens the eye more effectively than any liner.
- Cotton buds and micellar water
- For cleaning up a wing or softening an edge without redoing the whole eye.
The routine, step by step
Work in this order and check the mirror with your eyes open between each step. The whole thing takes about ten minutes once you have done it a few times.
1. Start with clean, dry lids
Cleanse the eye area and make sure no oily cleanser or moisturiser is left sitting on the lid. Residue gives the primer nothing to grip, and the shadow will slide into the fold within the hour.
2. Prime thinly, then set
Press a small amount of eye primer over the lid and up to where your crease shade will sit. Wait a few seconds, then dust translucent powder over it. Thin layers only — a thick, tacky base makes the fold stick to itself and crease.
3. Map the crease with your eyes open
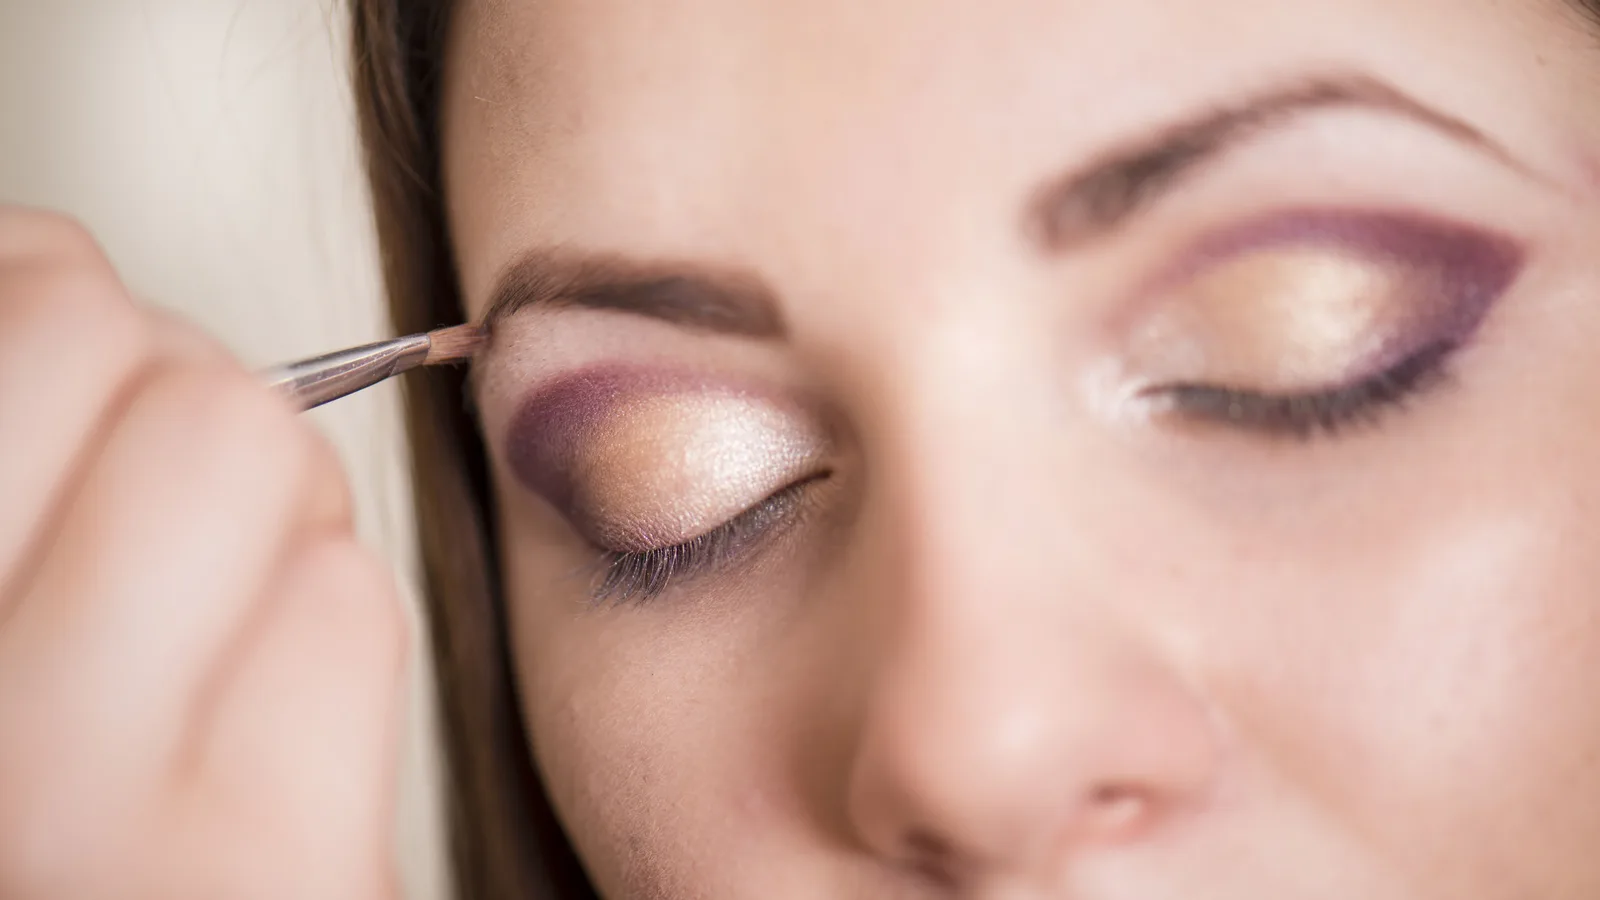
Look straight ahead. With the small brush, place your transition shade above your natural crease, roughly where you can still see it with the eye open. Feel for the brow bone with a fingertip first and stop below it.
4. Build colour on the visible lid
Pat a mid-tone over the mobile lid, staying under the fold. Use a patting motion rather than a sweep, so the colour sits where you put it instead of spreading up under the hood.
5. Deepen the outer corner and lash line
Take the deeper shade on the small brush and press it into the outer third and along the upper lash line. Blend slightly upwards — never out towards the temple, which drags the eye down.
6. Line with the eye open
Tightline the upper lash line, or draw your wing while looking straight ahead. The line should look continuous with the eye open, even if it looks slightly odd when shut.
7. Curl, then mascara
Curl the lashes before any mascara, holding for a few seconds at the root, mid-length and tips. Then wiggle mascara through the roots and put a second coat on the outer lashes to lift the corner.
8. Set and check in daylight
Dust a little translucent powder over the lid, tidy any fallout with a cotton bud, and check by a window. What looks blended under bathroom lighting often shows a hard edge in daylight.
Getting the crease placement right
This is the step that decides whether the whole look works. Your natural crease is largely hidden by the hood, so shading into it puts colour exactly where nobody can see it — and leaves the visible area above it bare.
Find the spot by looking straight ahead and marking, in your mind, the highest point of the fold. Your transition shade belongs just above that line, feathered up towards the brow bone and softened so there is no visible starting edge. Bring a little of the same shade down onto the outer half of the lid to connect the two areas.
Keep the deepest colour low. A common instinct is to deepen the whole crease, which closes the eye; instead, concentrate the dark tone along the lash line and in the outer third, where it adds depth without eating lid space.
Eyeliner options that survive the hood
Liner is where hooded eyes cause the most frustration, because a classic flick drawn with the eye closed disappears or bends when you open it. These three approaches hold up.
Three liner shapes that work with a hood rather than against it
Liner style
What it does
- Tightline
- Colours the upper lash line so lashes look fuller and the eye looks defined without using up any lid space
- Soft smudged wing
- A wing drawn with the eye open, then blended downwards so the fold does not slice through it
- Batwing liner
- Thin across the middle of the lid and thicker at the outer corner, so it still reads as a wing when the eye is open
Best for
- Tightline
- Everyday looks and lids with very little visible space
- Soft smudged wing
- Evening looks and anyone who prefers a softer edge
- Batwing liner
- Very hooded or deep-set eyes where standard liner disappears
What commonly goes wrong, and how to fix it
- The colour disappears when you open your eyes. It was placed too low. Move the transition shade above the fold and rebuild from there.
- Shadow transfers onto the hood by lunchtime. Primer was too thick, or not set. Use less, powder over it, and keep the layers thin; blot the hood with a tissue before you start.
- The wing looks bent or wonky. It was drawn with the eye shut. Draw with the eye open, following the angle of the lower lash line, and fill the gap that appears when you look straight ahead.
- Shimmer ends up everywhere. Tap the brush off before applying and do eye makeup before base makeup so fallout can be swept away, not wiped off foundation.
- The shadow creases into hard lines. Too much product, or a cream texture sitting in the fold. Press, don't sweep, and keep richer textures on the lid only.
- The eye looks smaller, not bigger. The dark shade is covering too much of the lid. Pull it back to the lash line and outer third and leave the centre light.
Safety and easy-to-get-wrong details
- Curl lashes before mascara, never after. Curling coated lashes can pull them out and damage the lash line.
- Remove eye makeup fully before bed. Liner that settles into the fold overnight is a common cause of irritation and styes.
- If your lids are eczema-prone or sensitive, patch test any new primer or shadow on the inner arm first and keep it away from the lash line if it stings.
- Stop using anything that makes your eye water, itch or swell, and see a pharmacist or GP if irritation persists.
- Take care with sticky tape as a guide for a sharp wing: on thin or loose lid skin it can tear. A tissue held underneath gives a similar edge with less risk.
Adapting the routine to your eye shape
"Hooded" covers a wide range. If you have a small but visible strip of lid, the full routine above will work with one mid-tone and one deeper shade. If the fold covers nearly all of the lid, skip lid colour altogether and put everything into the crease area above the fold, the lash line and the outer corner.
Deep-set hooded eyes need less dark shading, because the socket already provides depth — keep the deep tone tight to the lashes. If the hood is caused by looser skin rather than the bone structure, use less product and more blending: heavy shadow settles into texture and emphasises it. On mature lids, a matte finish and a light hand almost always look better than dense shimmer.
Whatever your version, the same three things buy you the most visible difference: a shaded line above the fold, a tightlined lash line, and curled lashes.
Frequently asked questions
Should I try a cut crease on hooded eyes?
Does eyeliner make hooded eyes look smaller?
How do I stop eyeshadow transferring onto the hood?
Can I wear shimmery eyeshadow with hooded eyes?
What is the quickest version of this routine?
Related articles
How to Apply Foundation: The Best Way, Step by Step
The best way to apply foundation is thin layers, the right tool and a good colour match. Here is the step-by-step method, plus fixes for common mistakes.
Looks, Step by Step
How to Cover Dark Circles: A Step-by-Step Method
A step-by-step guide to covering dark circles: picking the right corrector, applying thin layers, setting without creasing or caking.
Looks, Step by Step
How to Store Makeup Brushes: The Best Way to Keep Them Clean
Keep brushes dry, shaped and dust-free with upright jars, divided drawers and travel rolls — plus the damp-bathroom mistake to avoid.
Looks, Step by Step
How to Clean a Beautyblender: Step-by-Step Washing Guide
A simple, safe way to wash a Beautyblender: the everyday method, a deeper clean for set-in foundation, how to dry it properly and what to avoid.
Looks, Step by Step
How Do You Apply Concealer? A Step-by-Step Guide
How to apply concealer properly: prep the skin, match the shade, blend under the eyes and cover blemishes without caking or creasing.
Looks, Step by Step
How to Cover a Hickey With Makeup (and Make It Last)
Concealer alone leaves a grey patch. Colour correct, conceal and set a hickey properly so it stays hidden through daylight, hugs and a full day out.
Looks, Step by Step
How to Apply False Eyelashes (Strip and Individual)
A step-by-step guide to applying false eyelashes cleanly at home, from trimming and gluing the strip to fixing lifting corners and removing safely.
Looks, Step by Step
How to Apply Makeup Step by Step (With Photo Checks)
A step-by-step makeup routine you can follow and check as you go: skin prep, base, brows, eyes, cheeks and lips, plus fixes for common mistakes.
Looks, Step by Step
How to Apply Mascara Without Clumps or Smudges
Learn how to apply mascara cleanly in a few minutes: prepare lashes, curl, build coats from the roots, avoid clumps and remove it safely.
Looks, Step by Step
How to Choose Concealer Colour: Match Undertone and Job
Match concealer to your undertone and to the job in hand — dark circles, spots or redness — using a daylight test, corrector guidance and quick fixes.
Looks, Step by Step
How to Choose a Foundation Shade That Actually Matches
Match foundation properly: work out your undertone in daylight, swatch three shades along the jaw, allow for oxidation, and check against your neck.
Looks, Step by Step
How to Clean Makeup Brushes: A Step-by-Step Guide
Wash make-up brushes without wrecking the bristles: the short answer, a step-by-step method, drying tips and how often each brush needs a clean.
Looks, Step by Step
How to Do a Natural Makeup Look: Step-by-Step Guide
Learn how to do a natural makeup look in order: skin prep, sheer base, soft brows, wash of colour and a tinted lip, plus fixes for common mistakes.
Looks, Step by Step
How to Do Winged Eyeliner for Beginners, Step by Step
A beginner's step-by-step guide to winged eyeliner: choosing a liner you can control, finding your flick angle, building the wing and fixing mistakes.
Looks, Step by Step
How to Get Makeup Out of Clothes: Stain-by-Stain Guide
Blot, lift the oil, then wash: a step-by-step guide to removing foundation, lipstick, mascara and powder from clothes without spreading the stain.
Looks, Step by Step
How to Look Good Without Makeup: A Practical Daily Routine
A practical, no-nonsense guide to looking good without makeup: skin prep, brow and lash grooming, colour, and fixes for what usually goes wrong.
Looks, Step by Step
How to Remove Make-up Properly, Step by Step
How to remove make-up properly, step by step: cleanse eyes first, double cleanse, and avoid the tugging and scrubbing that irritates skin.
Looks, Step by Step
How to Remove Mascara Gently, Without Losing Lashes
A step-by-step guide to taking off mascara gently — including waterproof formulas, lash extensions and the mistakes that leave residue behind.
Looks, Step by Step
How to Remove Waterproof Mascara Without Losing Lashes
Waterproof mascara needs oil, not water. Here's the gentle step-by-step removal method, plus fixes for residue, stinging and lash loss.
Looks, Step by Step
How to Stop Mascara Smudging: A Practical Guide
Stop mascara smudging with a practical routine: prep oily lids, apply less, shield the under-eye and set with powder. Plus fixes for panda eyes.
Looks, Step by Step
How to Use Colour Corrector: A Step-by-Step Guide
Colour corrector neutralises redness, dark circles and sallowness before concealer. Learn which shade to pick, how much to use and how to apply it.
Looks, Step by Step
How to Use Highlighter Makeup: Placement, Blending and Order
Learn where to place highlighter, which formula to use and how to blend it so it flatters your skin tone instead of sitting in patches.
Looks, Step by Step
How to Use Laura Geller Makeup: Baked Powders, Step by Step
A step-by-step guide to using Laura Geller baked powders: priming, swirling, tapping and buffing foundation, blush, eyeshadow and highlighter.
Looks, Step by Step